
ARTISAN KEYCAP - UFO Crash Landing. Behind the scenes

It’s done! What a ride.
I have been very inspired by my surroundings lately. Being stuck in New Mexico due to Covid has been a blessing in disguise in many ways. One great thing about being here is the fact that there are some BEAUTIFUL landscapes. Endless deserts and clear night skies have been a great creative playground for me.

I have been experimenting with various ideas for my next keycap over the last couple of months. I’ve spent countless hours in my makeshift workshop plugging away on asteroid caps while Angels and Airwaves is running through my headphones. I kept thinking, what’s next? All I knew is that I was still hooked on the outer space theme.
I decided to come up with a UFO crash landing scenario. Part of this idea came from the desire to go all out filming a video using the desert surroundings. Commence two months of trial and error. Keycap first. Video later.

The way these are made is a new technique for me. I’m still working out the kinks, and to this day there are tons of caps that just don’t make the cut. Sometimes I’ll make 8 at a time only to be left with maybe two or three that I would feel comfortable sending out to you guys. I learned a lot during this process.
Design. 3d print. Make Mold. Repeat.

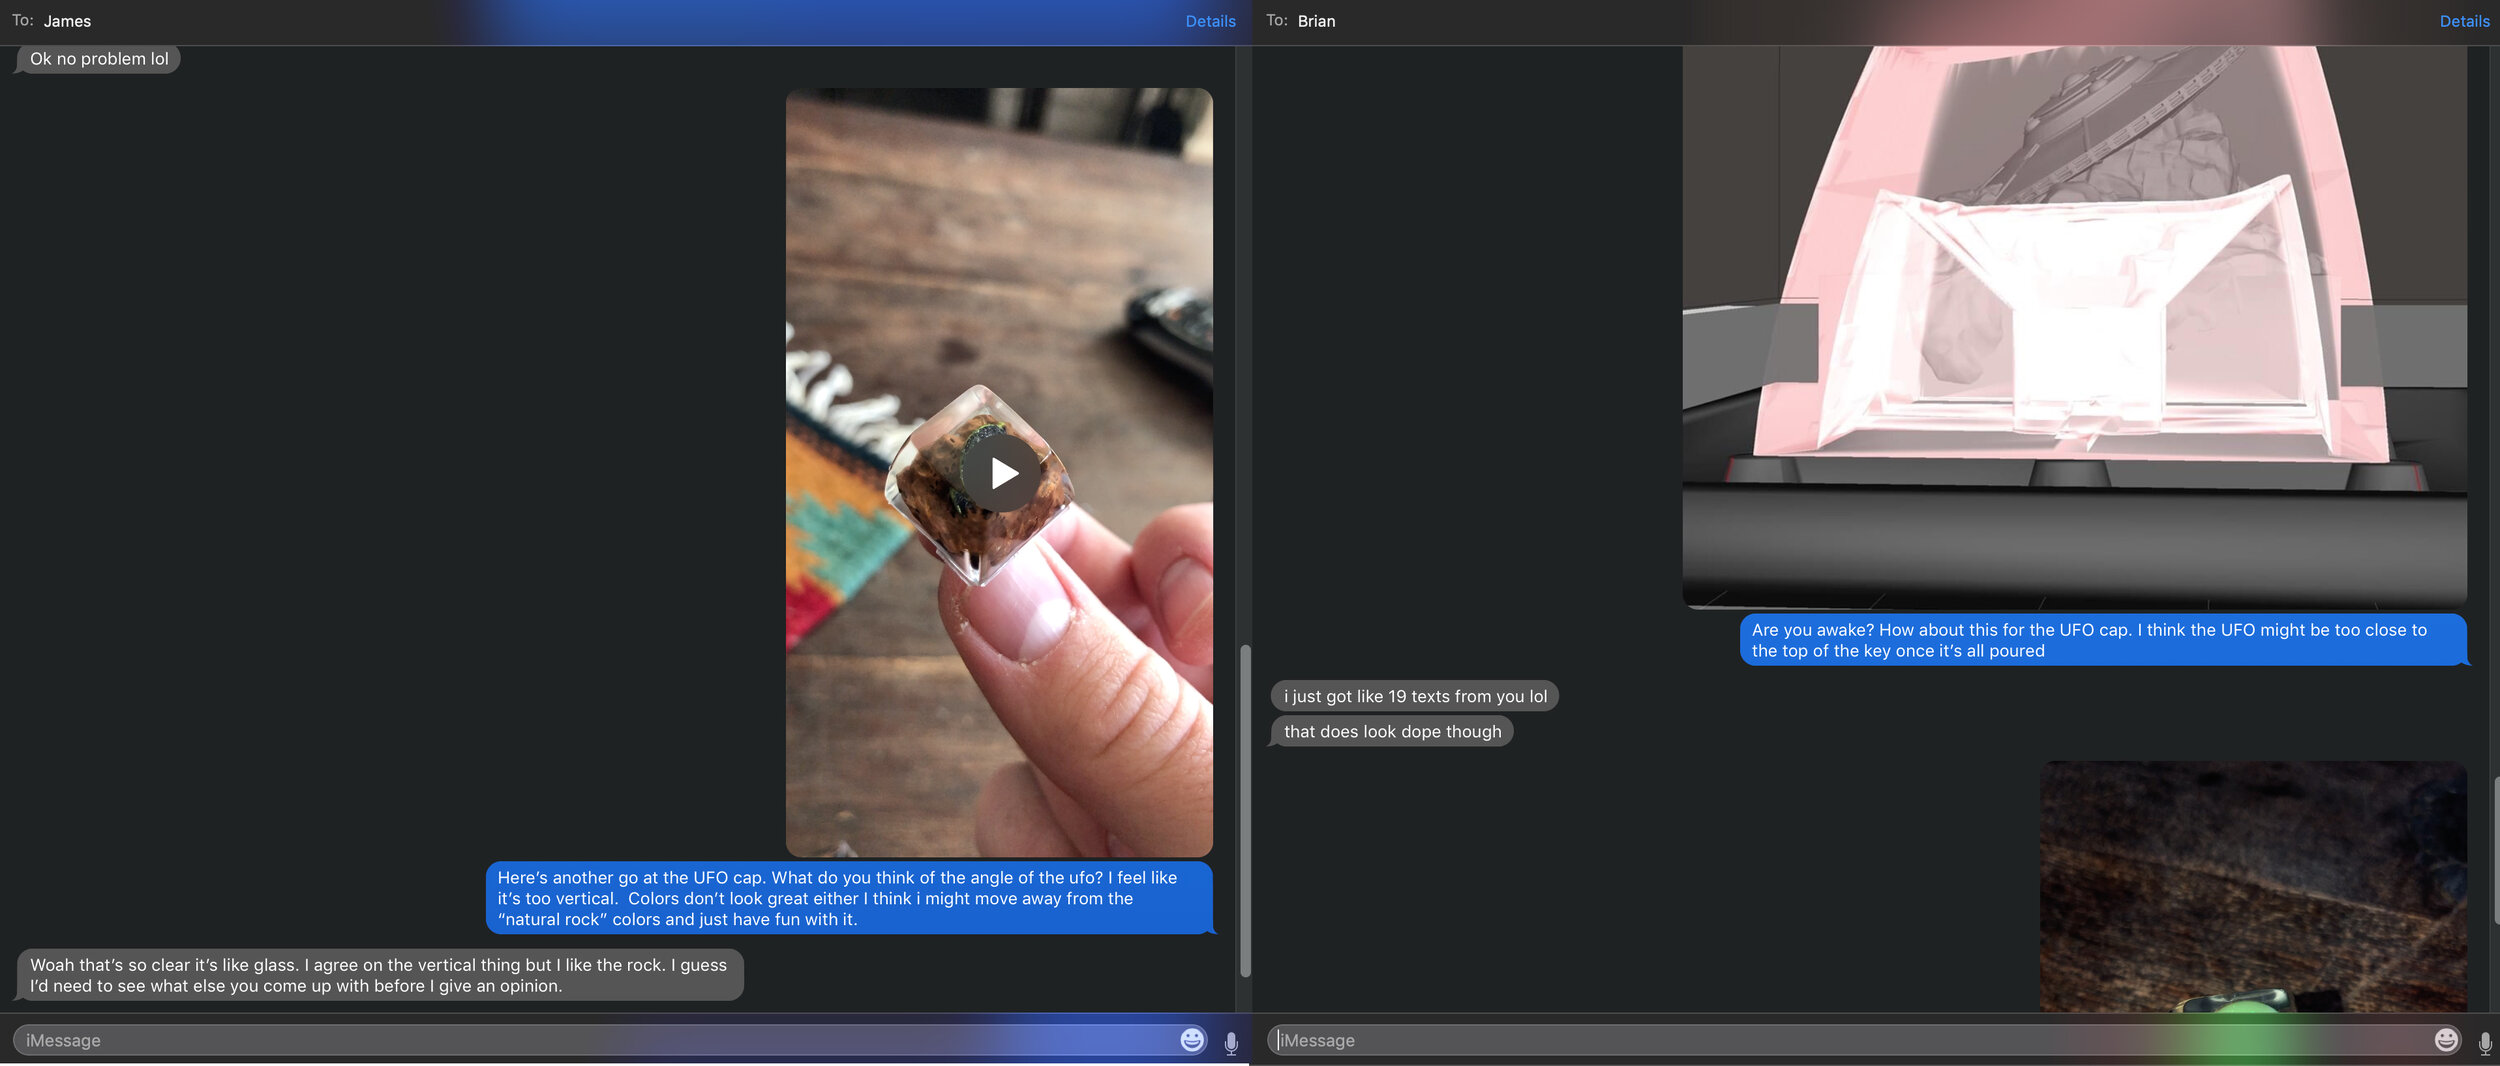
The final keycap design you see for sale is actually the 4th revision.
There were a lot of little tweaks and changes along the way to come up with the final product. Each little tweak requires a new 3D print to be made, and a new silicone mold to be poured before we can even begin to form it into a working keycap. I feel like I probably annoyed some of my friends during this phase with all of the “what do you think of this?” texts.
YES. The design is finished!
It’s a great feeling to get out of the design phase. This means I can put my head down and go into “production mode”. I can finally throw on some headphones, come up with a process to make these as efficiently as possible, and start thinking of the part I was excited about from the very start..

The video.
Now I’m a photographer by trade, but that doesn’t necessarily translate to video. Video has always been a bit of a struggle for me. I go back and forth loving and hating it. Back in the day when I was painting controllers I had a youtube channel that I tried to upload videos on frequently. It got easier over time but I would still run into some issues here and there.
I feel like video is a powerful and necessary tool these days; and part of the plan to be “all in” on the keycaps is getting more comfortable with video. Speaking of, I’ve got a new youtube channel for that. My previous one got deleted somehow, but I’ll be uploading all of my old controller videos on there too.

The first thing I went out to film was the nature stuff. The first outing was a 5am trek up a mountain for sunrise. The “night” shots scattered throughout the video were actually filmed at this time mostly after the sun had risen. I ended up using a mix of drone shots (Mavic 2, and an FPV drone that I built for those that are interested). The time-lapses I shot that morning didn’t really make the cut, oh well.

The rest of the shots were filmed indoors. I even threw some analog video feed from the FPV drone handheld “scanning” across the keycaps (shown briefly here in the video)

From there I worked my way through the edit. Some revisions after reaching out to friends. And finally a finished product.
Hopefully this was interesting for some of you. Just wanted to show you what goes into a new keycap idea from start to finish!